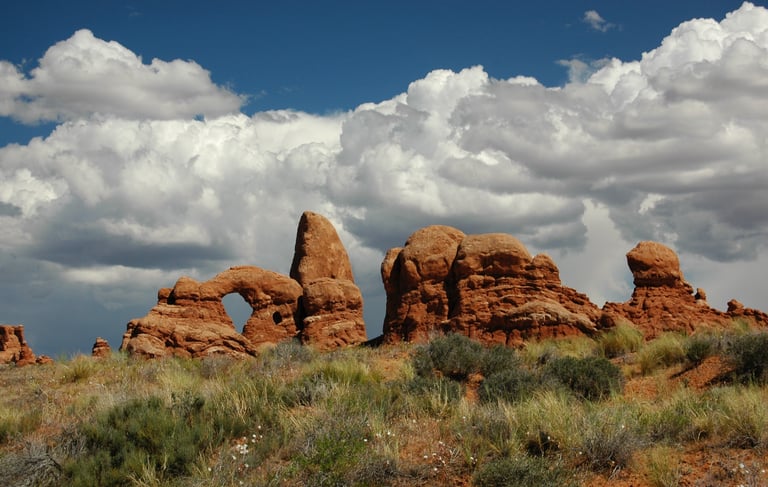
Landscapes
To capture the best landscape photographs, prioritize finding good lighting, using a tripod, composing your shot with the "rule of thirds," including an interesting foreground element, shooting in RAW format, and utilizing a wide-angle lens to capture the full expanse of the scene; most importantly, pay attention to your composition and focus on capturing the scene's depth and interesting details.
Key points for landscape photography:
Lighting:
Seek out optimal lighting conditions like sunrise, sunset, or soft diffused light to enhance colors and details.
Tripod:
Use a tripod to ensure sharp images, especially when shooting in low-light situations or with slower shutter speeds.
Composition:
Apply the "rule of thirds" to create visually pleasing arrangements by placing key elements along imaginary gridlines.
Foreground interest:
Incorporate a prominent foreground element like a rock, tree, or body of water to add depth and visual appeal.
Wide-angle lens:
Utilize a wide-angle lens to capture a broader view of the landscape.
RAW format:
Shoot in RAW file format to retain maximum image data for post-processing adjustments.
Aperture:
Adjust your aperture to control depth of field, often using a smaller aperture (like f/11 to f/16) for sharp details throughout the scene.
Focus:
Carefully focus on your subject, considering the depth of the scene and the desired focus point.
More Tips
· White balance: Auto or Kelvin 5000-6000. Auto white balance is a good option, or you can use a Kelvin setting of 5000–6000 for a slight warmth.
· ISO: 100 or the lowest possible. A higher ISO setting requires a faster shutter speed to properly expose the image.
· Shutter speed: 1/100 sec for freezing movement, or 1/3–2/3 sec for blurring water. The shutter speed you need depends on the scene and whether you want to freeze or blur movement.
· Focus mode: Aperture priority or manual focus. Aperture priority mode automatically adjusts the shutter speed to balance the sharpness of the foreground and background. Manual focus can be used if autofocus isn't sharp enough.
· Drive mode: Single shot

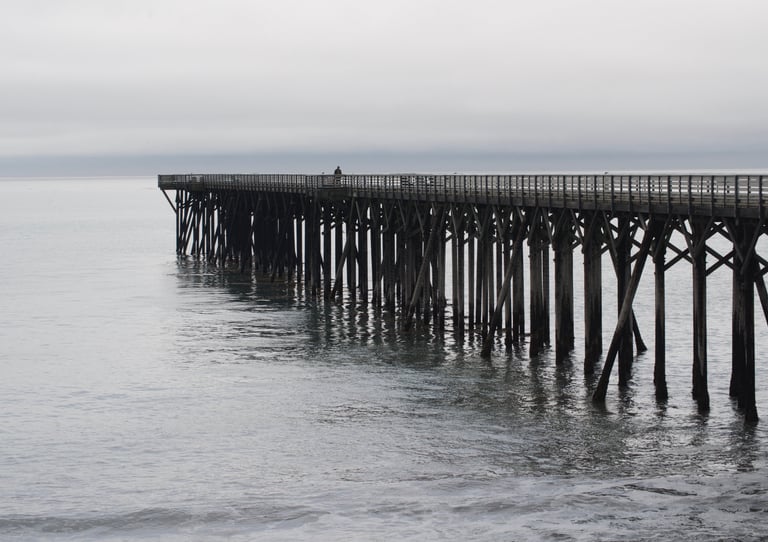
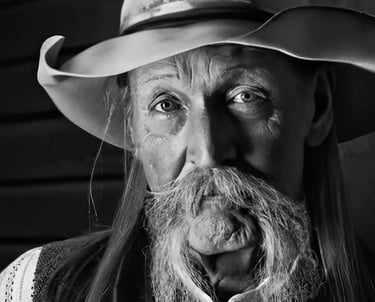
Black and White
To photograph great black and white pictures, focus on finding scenes with high contrast between light and dark areas, utilizing shadows effectively, paying close attention to textures and shapes, and shooting in RAW format to maximize post-processing options; consider using a small aperture and low ISO to maintain image quality, and often shoot in monochrome mode on your camera to visualize the scene in black and white while composing your shot.
Key aspects of black and white photography:
Contrast is key:
Look for scenes with distinct light and dark areas to create impactful black and white images.
Shadow play:
Utilize shadows to separate your subject from the background and add depth to your composition.
Texture and pattern:
Black and white photography accentuates textures and patterns, so seek out subjects with interesting surface details.
Shoot in RAW:
RAW format allows for greater flexibility in post-processing, giving you more control over tonal adjustments in your black and white image.
Monochrome mode:
Using your camera's monochrome mode can help you visualize the scene in black and white as you compose your shot.
Aperture and ISO:
Generally, use a smaller aperture like f/8 or f/11.
Lighting considerations:
Hard light: Can create strong contrast with deep shadows, good for dramatic effects.
Soft light: Provides more even lighting, ideal for subtle details.
More Tips
ISO:
Set to the lowest possible value (usually around 100) to minimize noise and grain in your image, especially important for black and white photography where subtle tonal changes are crucial.
Aperture:
Choose a smaller aperture like f/8 or f/11 to achieve a larger depth of field, ensuring most of your scene is in focus.
Shutter Speed:
Adjust based on lighting conditions and desired motion blur. For sharp details, use a faster shutter speed, while a slower shutter can add creative effects with movement.
Filters:
Experiment with colored filters (like red or orange) to accentuate specific elements in your scene depending on your subject matter.
Lighting:
Pay close attention to lighting conditions, as black and white photography thrives on strong contrast between light and shadow.
Composition:
Focus on strong lines, shapes, and textures as they become more prominent in black and white images.
Pets
To best photograph pets, shoot at their eye level using natural light, be patient, engage them with toys or treats to get their attention, and avoid using flash as it can startle them; focus on capturing their eyes for the most expressive shots, and consider different angles to enhance the photo's composition.
Key points to remember:
Get down to their level:
Shoot from a low angle to capture their perspective and make them appear more prominent in the frame.
Natural light is best:
Utilize natural lighting whenever possible to avoid harsh shadows and startled reactions from flash.
Focus on the eyes:
The eyes are the most expressive part of a pet's face, so ensure they are sharp and in focus.
Use distractions:
Employ toys, treats, or sounds to direct your pet's attention towards the camera.
Be patient:
Animals can be unpredictable, so be ready to wait for the perfect moment to capture a natural expression.
Consider different angles:
Experiment with shooting from above, below, or the side to find the most interesting perspective.
Avoid flash:
Flash can be startling for pets and may result in red-eye.
Proper aperture:
Adjust your aperture between f/8 and f/11 to ensure the whole subject is in focus, particularly the eyes.


ISO:
Set to the lowest possible value (usually around 100) to minimize noise and grain in your image, especially important for black and white photography where subtle tonal changes are crucial.
Shutter Speed:
Adjust based on lighting conditions and desired motion blur. For sharp details, use a faster shutter speed, while a slower shutter can add creative effects with movement.
Filters:
Experiment with colored filters (like red or orange) to accentuate specific elements in your scene depending on your subject matter.
Lighting:
Pay close attention to lighting conditions, as black and white photography thrives on strong contrast between light and shadow.
Composition:
Focus on strong lines, shapes, and textures as they become more prominent in black and white images.
More Tips
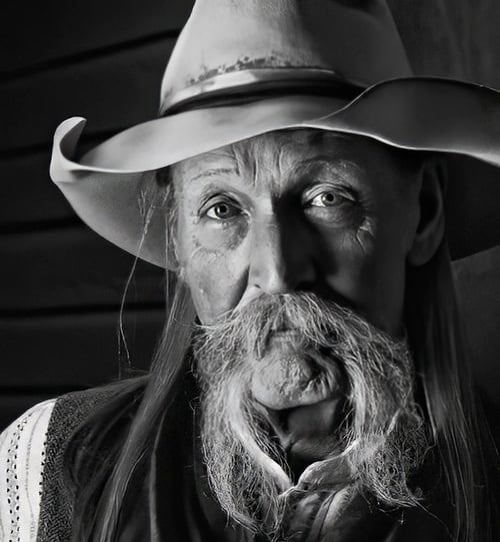
Portraits
To take a good portrait, you can consider your lighting, composition, and camera settings. You can also try to capture your subject's emotions and expressions.
Aperture:
Use a wide aperture to isolate the subject from the background
A lower f-stop creates a blurred background, while a higher f-stop creates a more in-focus background
Set the camera to Aperture Priority mode so the camera chooses the shutter speed based on the aperture setting
Shutter speed:
Use a fast shutter speed (1/100s or faster) to avoid motion blur
If you want to include motion blur, choose a shutter speed that creates the desired amount of blur
ISO:
Use a low ISO (100-1600) to reduce noise and create a clearer image
If you're shooting in natural light, try to keep your ISO around 100
You can raise your ISO if needed to compensate for a darker image caused by a faster shutter speed
More Tips
Metering mode:
Use the Center-Weighted metering mode to get proper exposure for most portraits
White balance:
Match the white balance to the lighting
Set the white balance to AWB for a good middle ground
Other tips:
Shoot at eye level
Use a simple, clean backdrop
Use a focal length of 85-135mm
Shoot RAW
Take test shots and get feedback
Architecture
To take architectural photos, you can use a variety of lenses, a tripod, and try different angles. You can also consider the lighting, weather, and time of day.
Equipment:
Camera: A DSLR or interchangeable-lens camera is a good choice.
Lenses: Wide-angle lenses are good for capturing large views, while tilt-shift lenses can help correct perspective distortions.
Tripod: A tripod helps keep your camera steady, which is important for blur-free images.
Composition:
Find a unique angle: Try getting close to the building or shooting from a different perspective.
Use leading lines: Use naturally occurring lines in the building to guide the viewer's eye through the image.
Add scale: Include everyday objects like trees to add scale to your image.
Lighting:
Prioritize good lighting: Consider shooting at different times of day and in different weather conditions.
Use HDR: High dynamic range images can add drama to exterior shots.
Post-processing:
Use editing software to compensate for lens distortion.
Use post-processing tools to enhance your images.


Aperture:
A narrow aperture, like f/11, lets in less light, which can help you achieve sharper shots.
The aperture is the size of the opening in the lens that allows light to reach the camera's sensor.
ISO:
A low ISO, like ISO 100 or 200, can help you achieve sharper shots.
Shutter speed:
A faster shutter speed, like 1/250 sec, is better for well-lit areas.
A slower shutter speed, like 1/30 sec, is better for low light.
Longer shutter speeds can cause camera shake and blur the image if you don't use a tripod.
Camera level and vertical:
Make sure your camera is level and vertical. You can use an electronic level or an L bracket to help.
Back button focus:
Use the AF-ON button on the back of your camera instead of the shutter release button to focus.
More Tips
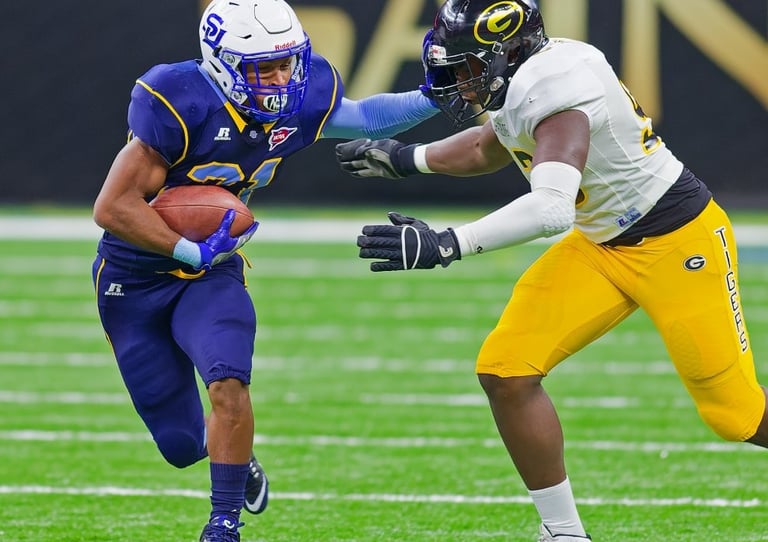
Sports
More Tips
Here are some tech tips for sports photography:
Use a fast shutter speed: A fast shutter speed (at least 1/1000th of a second) is essential for freezing the action and capturing sharp images of fast-moving athletes.
Choose the right lens: A telephoto lens (70-200mm or 100-400mm) is ideal for sports photography, as it allows you to capture distant action and compress the perspective.
Use a camera with good autofocus: A camera with advanced autofocus capabilities, such as phase detection or contrast detection, can help you track fast-moving subjects and ensure sharp focus.
Shoot in burst mode: Burst mode allows you to take multiple shots in quick succession, increasing your chances of capturing the perfect moment.
Use a high ISO: If you're shooting in low light, don't be afraid to push your ISO up to 6400 or higher. This will allow you to capture images in conditions that would otherwise be too dark.
Pay attention to white balance: White balance can greatly affect the look and feel of your images. Make sure to adjust your white balance settings to match the lighting conditions of the event.
Use a monopod or tripod: A monopod or tripod can help you stabilize your camera and reduce camera shake, especially when using long lenses.
Shoot in RAW: Shooting in RAW format gives you more flexibility when editing your images, as it captures more data than JPEG files.
Use a camera with good buffer capacity: A camera with a large buffer capacity can handle long bursts of shots without slowing down, allowing you to capture more images without interruption.
Practice, practice, practice: The more you practice sports photography, the better you'll become at anticipating and capturing the action. Understanding your camera's capabilities and practicing with different settings will help you capture the best shots in various sports situations.
Additionally, here are some specific tips for different types of sports:
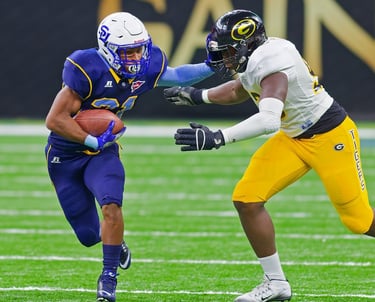
Football: Use a wide-angle lens to capture the action on the field, and a telephoto lens to capture close-ups of the players.
Basketball: Use a fast shutter speed to freeze the action, and a wide-angle lens to capture the movement of the players.
Baseball: Use a telephoto lens to capture the action on the field, and a fast shutter speed to freeze the ball in mid-air.
Tennis: Use a fast shutter speed to freeze the action, and a wide-angle lens to capture the movement of the players.
More Tips
Some other tips when shooting macro photography is to use a small aperture (f/11 – f/22) as the lens will have a narrower depth of field the closer you are to the subject.
A shutter speed of 1/200 and an ISO of 100 is suggested along with an f/11 aperture. Using these settings, most macro shots will feature a dark (i.e. underexposed) background.
If you want a brighter background, consider using different angles in which there is less distance between the subject and the background.
Some popular macro photography equipment includes:
Canon MP-E 65mm f/2.8 1-5x Macro Lens
Nikon AF-S VR Micro-NIKKOR 105mm f/2.8G IF-ED Lens
Sony FE 100mm f/2.8 STF GM OSS Lens
Olympus M.Zuiko Digital ED 60mm f/2.8 Macro Lens
Tamron 90mm f/2.8 Di Macro Lens
Some popular macro photography software includes:
Adobe Photoshop
Lightroom
Skylum Luminar
Capture One
Helicon Focus (for focus stacking)
Remember, the key to successful macro photography is to experiment, practice, and have fun!
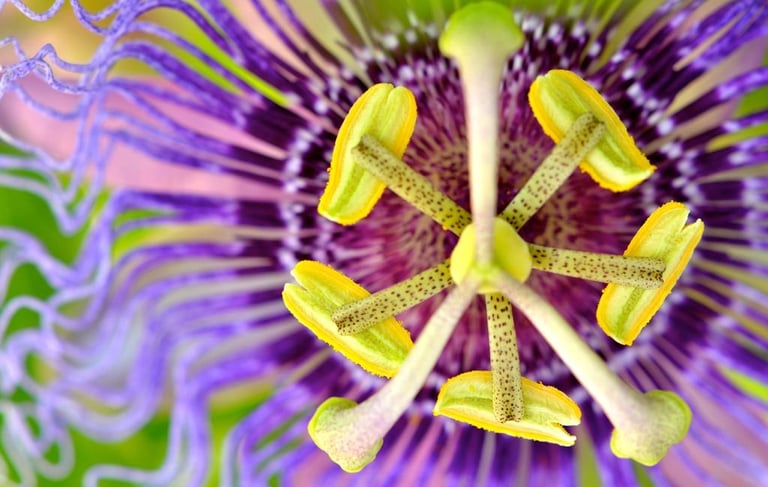
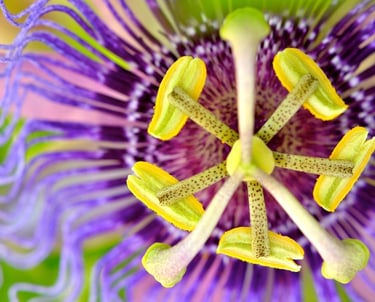
Macro
Macro photography is a fascinating field that allows you to capture the tiny details of the world around us. Here are some tech tips to help you improve your macro photography skills:
Use a dedicated macro lens: A macro lens is specifically designed for close-up photography and can produce high-quality images with a high level of detail. Look for a lens with a 1:1 or 2:1 magnification ratio.
Extension tubes and close-up lenses: If you don't have a dedicated macro lens, you can use extension tubes or close-up lenses to achieve a similar effect. These accessories can be attached to your existing lens to increase the magnification.
Reverse ring: A reverse ring is a simple and inexpensive way to turn your lens into a macro lens. It allows you to attach your lens to the camera body in reverse, which can increase the magnification.
Tripod and remote shutter release: A tripod is essential for macro photography, as it allows you to stabilize the camera and avoid camera shake. A remote shutter release or the camera's self-timer can also help to minimize camera shake.
Focus stacking: Focus stacking is a technique that involves taking multiple images of the same subject at different focus points and then combining them into a single image. This can help to increase the depth of field and produce a sharper image.
Use a flash or external light source: Macro photography often requires a lot of light, especially when working with small subjects. A flash or external light source can help to illuminate the subject and reduce shadows.
Diffuse the light: Harsh light can create unflattering shadows and highlights in macro photography. Use a diffuser or a softbox to soften the light and create a more even illumination.
Experiment with different angles: Don't be afraid to experiment with different angles and perspectives in macro photography. Get low, climb high, or try shooting from a unique vantage point to add interest to your images.
Pay attention to background: The background can make or break a macro photograph. Use a plain colored background or a natural background that complements the subject to create a visually appealing image.
Practice, practice, practice: Macro photography requires patience and practice. Experiment with different techniques, subjects, and lighting setups to develop your skills and style.
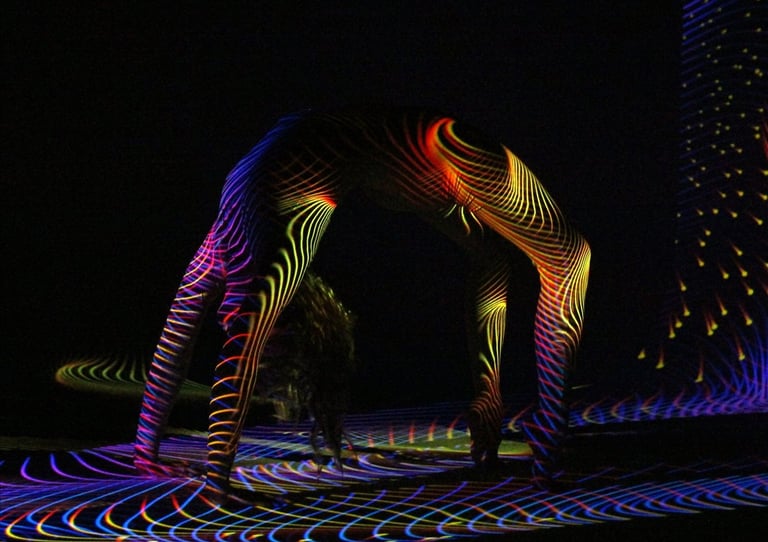
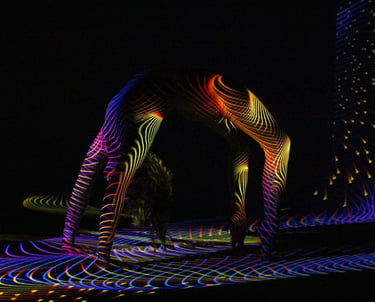
Abstract
To take abstract photos, focus on capturing elements like strong shapes, interesting textures, patterns, light and shadow, by using techniques like macro photography, playing with perspective, capturing motion with a slow shutter speed, and utilizing creative composition, while often relying heavily on post-processing to further enhance the abstract quality of the image; essentially, look for ways to simplify a scene down to its basic visual components rather than capturing a recognizable subject.
Key strategies for abstract photography:
· Focus on shapes and lines:
Look for prominent shapes, lines, and patterns in your subject, isolating them to create a visually striking image.
· Use macro photography:
Get close-up to subjects to reveal minute details and textures that can appear abstract.
· Play with perspective:
Experiment with different angles and viewpoints to distort the familiar and create a unique perspective.
· Capture motion blur:
Use a slow shutter speed to blur movement, creating abstract patterns from dynamic scenes.
· Control lighting:
Utilize light and shadow to emphasize shapes and create dramatic effects.
· Shoot through objects:
Take photos through translucent materials like glass or water to create distorted and abstract imagery.
· Minimalist composition:
Simplify the scene by focusing on a few key elements, removing clutter.
· Post-processing:
Utilize editing software to further manipulate colors, textures, and tones to enhance the abstract quality of your image.
More Tips
Shutter speed: Use a slow shutter speed to capture motion or create blur
Lens: Use a wide-angle lens (28mm) or a long telephoto lens (200mm+) to shift your perspective
Lighting: Customize your lighting, such as using low-key light or light painting
Experiment: Try shooting through objects, capturing motion, or playing with shadows
Multiple exposures: Take double-exposure pictures or combine multiple pictures in post-processing
Macro: Go macro to focus on details
Use blending modes to combine multiple pictures
Use Photoshop actions to create abstract effects
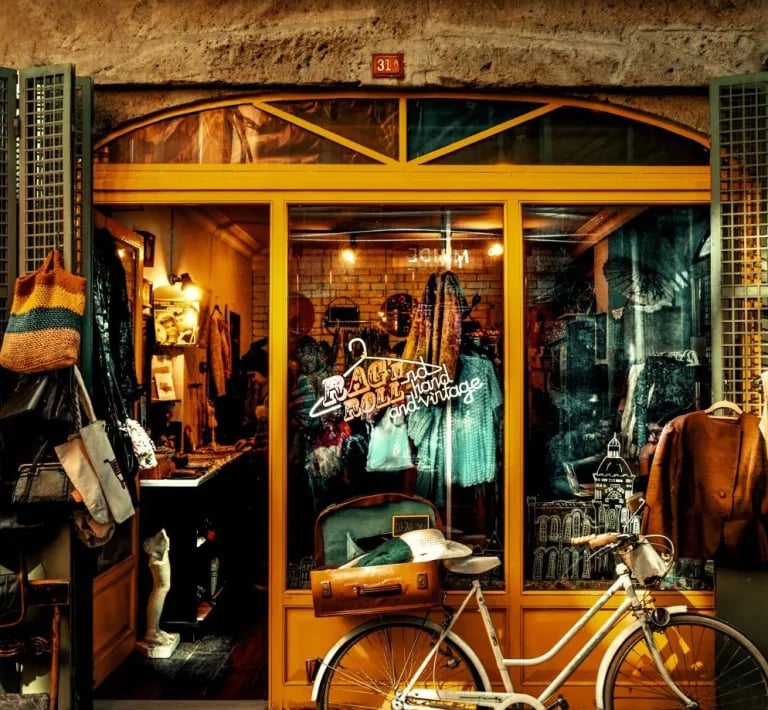
Street
To take the best street photos, focus on capturing "decisive moments" by being present in your environment, using a fast aperture lens to quickly focus, getting close to your subjects, and being aware of your surroundings while looking for interesting compositions and interactions, all while respecting people's privacy and potentially asking permission for portraits; a compact camera is often preferred for blending in and being less intrusive.
· "Decisive moment":
Capture fleeting, significant moments that tell a story, like a gesture, interaction, or unexpected juxtaposition.
· Camera choice:
Opt for a small, lightweight camera that allows you to blend in with your surroundings, often a mirrorless camera with a prime lens.
· Aperture:
Use a wide aperture (low f-number) like f/1.8 or f/2.8 to capture more light and isolate your subject.
· Shutter speed:
Choose a fast shutter speed to freeze movement and prevent blur, especially in busy environments.
· Get close:
Don't be afraid to move closer to your subjects to capture details and emotions.
· Observe and anticipate:
Walk around, observe people and situations, and try to predict interesting moments that might happen.
· Composition:
Pay attention to framing, leading lines, and negative space to create visually pleasing images.
· Respect privacy:
Be mindful of people's privacy and ask permission when necessary, especially for portraits.
· Ethical considerations:
If someone asks you to delete a photo, be respectful and do so.

Shutter speed: A fast shutter speed, like 1/125 sec or faster, to freeze action and avoid motion blur
Aperture: An aperture of f/5.6 to f/8 to create a moderate depth of field that separates the subject from the background
White balance: Auto white balance to accurately render tones
Focus mode: A preset focus distance and narrow aperture to make images without raising the camera to your eye
Exposure mode: Program AE or aperture priority mode
ISO: Auto ISO with a base ISO of 100 and a maximum of 3200
Focal length: A focal length of 18 mm to 200 mm
AF: Continuous focus
You can also try using "zone focusing", which involves setting a focus distance and leaving it there. This technique can be effective for reacting quickly and remaining unnoticed.