
More Tips
Post-Processing
Use software like Adobe Lightroom or Photoshop to adjust exposure, contrast, and color balance. HDR techniques can help balance bright highlights with deep shadows.
Additional Tips
Scout locations during the day to identify interesting compositions and angles.
Use Aperture Priority Mode if you're new to manual settings but want quick results for static subjects.
Test shots are crucial; adjust settings as needed based on results.
By mastering these techniques and experimenting with your camera's settings, you can create breathtaking night photography!
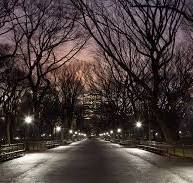
Night Scenes
Camera Settings
Manual Mode: Use manual mode to control ISO, aperture, and shutter speed. This allows you to balance exposure effectively in low-light conditions.
ISO: Stick to a low ISO (100-400) to reduce noise. If necessary, increase it slightly, but avoid going too high unless your camera handles noise well.
Aperture: Use a wide aperture (low f-number) to let in more light. This is especially useful for static subjects and night skies.
Shutter Speed: Opt for long exposures (several seconds or more) to capture more light. Use a remote trigger or timer to avoid camera shake during long exposures
.
Gear
Tripod: A sturdy tripod is essential for stability during long exposures. Consider using a bubble level or virtual horizon to ensure alignment.
Lens: Use a fast, wide-angle lens with a large maximum aperture for capturing expansive scenes and reducing noise.
Remote Shutter Release: Minimize vibrations by using a remote shutter release or intervalometer.
Focusing Techniques
Manual Focus: Autofocus struggles in low light. Switch to manual focus, use your camera’s live view, and magnify the subject to ensure sharpness.
Infinity Focus: For night skies or distant subjects, set your lens to infinity focus and fine-tune using live view.
Shooting Tips
Shoot in RAW: Capture images in RAW format to retain maximum detail and flexibility in post-processing.
Bracket Exposures: Take multiple shots at different exposure levels (e.g., underexposed, correctly exposed, overexposed) to combine later for HDR effects.
Experiment with Light Trails: Use slow shutter speeds (10–30 seconds) to capture light trails from cars or stars. For star trails, use Bulb Mode for extended exposures beyond 30 seconds.